Replace Serpentine Of 1998 f150 4.2: A DIY Guide!
When it comes to keeping your trusty 1998 Ford F-150 with its 4.2L V6 engine running smoothly, a healthy serpentine belt is super important. Replacing the serpentine belt on your 1998 Ford F-150 with a 4.2L engine is a job you can definitely tackle at home with a few basic tools and some patience. It might seem a bit tricky at first, but with the right steps, you’ll have your truck purring like a kitten again.
Don’t let the thought of working on your truck scare you! We’re here to walk you through every single step. Imagine us as your friendly mechanic, guiding your hands and making sure you don’t miss a beat. We’ve got all the insider tips and tricks to make this repair a breeze.
Get ready to dive into the world of automotive DIY! This guide will break down everything you need to know, from gathering your tools to that satisfying moment when your new belt is in place and your engine starts right up. Let’s get that old belt off and a shiny new one on!
Key Takeaways
- Tools You’ll Need: Gather a flat-blade screwdriver, a T50 Torx drive socket, and a serpentine belt removal tool (or a long breaker bar/ratchet).
- Safety First: Always make sure your engine is cool and disconnected from the battery before you start working.
- Locate the Belt Diagram: Find the diagram, usually under the hood, to correctly route the new belt. Take a photo of the old belt’s path if needed.
- Release Belt Tension: Use your serpentine belt tool or a long wrench to rotate the tensioner pulley and relieve the tension on the old belt.
- Consider Other Parts: While you’re in there, it’s a great time to inspect or replace the tensioner pulley and idler pulleys, especially if they’re squealing.
- Proper Installation: Route the new belt carefully according to the diagram, making sure it sits correctly in all pulley grooves before releasing the tensioner.

Why Your Serpentine Belt Needs Replacing
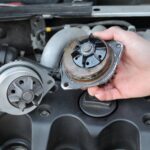
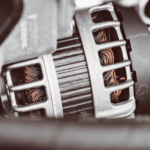
Think of your serpentine belt as the heart of your engine’s accessory system. It’s a long, winding belt that powers all sorts of important parts. This includes things like your alternator, power steering pump, air conditioning compressor, and perhaps your water pump.
Over time, this belt wears out. It can get cracks, fray, or even stretch. When it starts to go bad, you might hear squealing noises, especially when you first start your truck or when it’s cold. If it breaks completely, your truck will stop working pretty quickly, leaving you stranded.
That’s why it’s super important to replace it when you notice signs of wear. It’s a preventative measure that saves you a lot of headaches and money down the road. Regular maintenance keeps your F-150 running strong.
Gathering Your Tools and Supplies
Before you even think about touching your truck, you’ll want to have all your tools ready. There’s nothing worse than getting halfway through a job and realizing you’re missing something crucial!
For this job, you’ll need a few specific items. Don’t worry, most of these are pretty common and easy to find.
The Essential Tool List
First up, you’ll definitely need a serpentine belt removal tool. This tool is designed to fit onto your belt tensioner and provide the leverage you need to release the tension. You can buy one online (like on Amazon) or at almost any auto parts store.
If you don’t have a special serpentine belt tool, a long breaker bar, or a large ratchet with the correct size socket (usually 1/2 inch drive or 3/8 inch drive, depending on your tensioner) can often do the trick. The longer the handle, the easier it will be to get enough leverage.
You’ll also want a T50 Torx drive socket. This is often needed if you decide to replace your tensioner pulley or idler pulleys, which is a smart move while you’re already in there. Make sure it’s a good quality one, as these bolts can sometimes be tight. A flat-blade screwdriver can come in handy for prying or poking in tight spots.
Of course, you’ll need your new serpentine belt! Make sure it’s the correct one for your 1998 Ford F-150 with the 4.2L V6 engine and, importantly, confirm if your truck has AC or not, as this can affect the belt length. You might also want to pick up a new belt tensioner and idler pulleys if they’re making noise or look worn.
Safety First! Preparing Your F-150 for Belt Replacement
Before you start wrenching on your truck, safety is key. You don’t want to accidentally get hurt or damage anything. These steps are quick and easy but super important.
Engine and Battery Prep
Make sure your engine is completely cool. You don’t want to burn yourself on a hot engine block or exhaust manifold. Give it plenty of time to cool down if you’ve just been driving.
Next, it’s a good idea to disconnect the negative terminal on your truck’s battery. This prevents any accidental electrical issues while you’re working. Just use a wrench to loosen the nut and pull the cable off the battery post. Tuck it away so it doesn’t accidentally touch the terminal.
Locating the Belt Diagram and Mapping the Old Belt
This is a critical step that many people overlook! Your serpentine belt has a very specific path it needs to follow around all those pulleys. If you put it on wrong, your truck won’t run correctly, or the belt might even come off.
Finding the Belt Routing Diagram
Luckily, Ford usually puts a helpful diagram right under the hood of your F-150. Look on the underside of the hood, or sometimes it’s on a sticker on the radiator shroud. This diagram shows exactly how the belt should be routed around each pulley.
If you can’t find the diagram, or if it’s faded, don’t panic. Before you take the old belt off, take a photo with your phone! Take several photos from different angles. This visual reference will be a lifesaver when you’re trying to put the new belt on.
Releasing the Tension: Getting the Old Belt Off
Now for the main event! This is where you actually get to remove the old belt. It’s all about that tensioner pulley.
Using the Serpentine Belt Tool
Locate the belt tensioner pulley. It’s usually a spring-loaded pulley that keeps the belt tight. You’ll see a square hole or sometimes a nut on the tensioner arm where your serpentine belt tool or breaker bar will fit.
Attach your serpentine belt tool or long breaker bar to the tensioner pulley’s arm. You’ll need to push or pull (depending on the design) in a specific direction to rotate the tensioner and relieve the pressure on the belt. Look for an arrow on the tensioner indicating the direction to move it.
Once you’ve got the tensioner moved, the belt will become loose. While holding the tensioner in the loosened position, carefully slip the old belt off one of the pulleys, usually the easiest one to reach. Then, you can completely release the tensioner and remove the old serpentine belt entirely.

Inspecting and Replacing Other Components (Optional, But Recommended!)
While you have the old belt off, now is the absolute best time to check the condition of a few other important parts. These parts work closely with your serpentine belt, and if they’re worn out, they can prematurely ruin your new belt or cause more problems.
Checking Pulleys and Tensioner
Take a moment to spin all the pulleys by hand: the idler pulleys, the power steering pump pulley, the alternator pulley, and the AC compressor pulley. Do any of them feel rough when you spin them? Do they wobble? Do they make any grinding noises?
If any of your pulleys feel rough, wobble, or make noise, it’s a good idea to replace them now. A failing bearing in a pulley can cause squealing noises, and if it completely seizes, it will shred your new belt. The idler pulleys and the tensioner pulley are common culprits for making noise.
If your tensioner pulley looks rusty, or if the arm feels sloppy, it’s also a good idea to replace the entire tensioner assembly. Sometimes, a “screeching bearings” sound actually comes from a worn tensioner pulley. The T50 Torx socket is often used to remove the tensioner or idler pulleys.
Installing Your New Serpentine Belt
Okay, old belt is off, components are checked (and replaced if needed!) — now it’s time for the new belt. This part requires a bit of patience to get the routing just right.
Routing the New Belt
Refer back to your diagram (or your phone photos!) and start routing the new belt. It’s often easiest to start by putting the belt around the crankshaft pulley (the big one at the bottom) and then around the pulleys that don’t have flanges (edges) to hold the belt on.
Work your way around, making sure the belt sits perfectly in all the grooves of each pulley. This can be tricky in tight spaces, so take your time. Double-check that there are no twists in the belt.
The last pulley you’ll try to get the belt around will be the one on the tensioner.
Final Tensioner Release and Double Check
Once the belt is mostly routed, use your serpentine belt tool or breaker bar again to pull the tensioner back to its loosened position. While holding it, carefully slip the new belt over the tensioner pulley.
Slowly release the tensioner, allowing it to spring back and tighten the new belt. Once it’s released, do a very careful visual inspection of every single pulley. Make absolutely sure the belt is seated correctly in every single groove of every single pulley. Even one groove off can cause the belt to shred or come off.
Starting Up and Final Checks
You’re almost done! Now it’s time for the moment of truth: starting your F-150.
Reconnect Battery and Initial Start
Go back to your battery and reconnect the negative terminal. Make sure it’s snug.
Start your truck. Listen carefully for any unusual noises, like squeals, squeaks, or grinding. Watch the belt path too. Does it look like it’s running smoothly and staying on the pulleys?
If you hear any suspicious noises or see the belt wiggling, immediately turn off the engine. Recheck the belt routing and make sure all pulleys are turning freely.
Break-In and Inspection
Drive your truck for a short while, maybe a few miles. Then, turn it off and let it cool down. Pop the hood again and quickly inspect the belt. Does it still look good? Is it still perfectly seated on all the pulleys? Any new noises?
It’s normal for a new belt to stretch ever so slightly during its first few drives. But it should maintain its tension thanks to the tensioner. This quick check helps ensure everything is settled in properly.
Common Issues and Troubleshooting
Sometimes things don’t go perfectly the first time. Don’t worry, here are a few common issues you might run into.
Squealing After Replacement
If your new belt is squealing, here’s what to check:
- Incorrect Routing: This is the most common cause. Double- triple-check your belt diagram! One pulley routed wrong can make it squeal.
- Grease/Oil: Did you get any oil, grease, or coolant on the new belt during installation? Clean it off thoroughly with a rag, or consider replacing the belt if it’s soaked.
- Bad Pulleys: Remember when we talked about inspecting other components? A squealing new belt often means an old, failing pulley (idler, tensioner, or one of the accessory pulleys) is the real culprit.
- Tensioner Problem: If the tensioner itself is old and weak, it might not be applying enough tension to the new belt. This is where replacing the entire tensioner assembly really helps.
Belt Came Off
If the belt came off, it’s almost always due to incorrect routing or a bad pulley that caused it to jump. Re-route the belt carefully, making sure it’s deeply seated in all pulley grooves. Inspect all pulleys and the tensioner for any play or damage that might be throwing the belt off.
Difficulty Releasing Tension
If you’re having a really tough time getting the tensioner to move, you might need a longer breaker bar for more leverage. Sometimes, a quick spray of penetrating oil on the pivot point of the tensioner arm can help, but be careful not to get it on the belt or pulleys.
Conclusion: You Did It!
Congratulations, you’ve successfully replaced the serpentine belt on your 1998 Ford F-150 4.2L! That’s a solid DIY repair that saves you money and gives you a real sense of accomplishment. Your truck’s accessories are now happily humming along, powered by a fresh, new belt.
By taking the time to do this yourself, you’ve not only fixed an important part of your truck but also gained valuable experience and confidence in your mechanical skills. Keep up with your truck’s maintenance, and it will keep taking you wherever you need to go! Now go enjoy your quieter, smoother-running F-150!
