How to Remove Spare Tire from F150: Tools, Torque & Steps
Are you tired of struggling with the spare tire on your F150? Whether you’re on the side of the road or simply doing some routine maintenance, knowing how to properly remove the spare tire can save you time, effort, and stress.
Imagine being able to handle this task with ease, without the usual frustration. In this guide, you’ll discover a straightforward, step-by-step process tailored specifically for your F150. No more guesswork, no more hassle, just clear instructions that empower you to get back on the road confidently.
Read on, because mastering this skill might just be the most practical thing you do today.
Key Steps Locate the spare tire tools and lock key for your cab and bed configuration Assemble the crank and extension rods Find the spare tire access hole (usually above the rear bumper, near the license plate) Insert the tool and turn counterclockwise to lower the tire Release the tire from the carrier bracket and pull it clear Re-stow at the correct tension to prevent cable rattle

Know Your F-150 Spare Tire System
Most 2004–2024 F-150s use an under-bed cable system with a drop-down winch, but the tool location and access point vary by cab and bed configuration. On Regular and SuperCab trucks, the jack and tools are usually behind or under the rear seat. On SuperCrew models, check the storage compartment under the rear seat or behind the seat back. The spare tire lock key is often clipped inside the glove box or stored with the jack tools.
To identify your system, look under the rear of the truck. A drop-down winch has a visible square-nut drive and a cable running to a carrier bracket. If you see a plastic access cover above the rear bumper, insert the extension tool there. If your truck has a covered under-bed crank hole, the square nut is usually 3/4 inch or 19mm. Knowing this before you start saves you from guessing on the roadside.
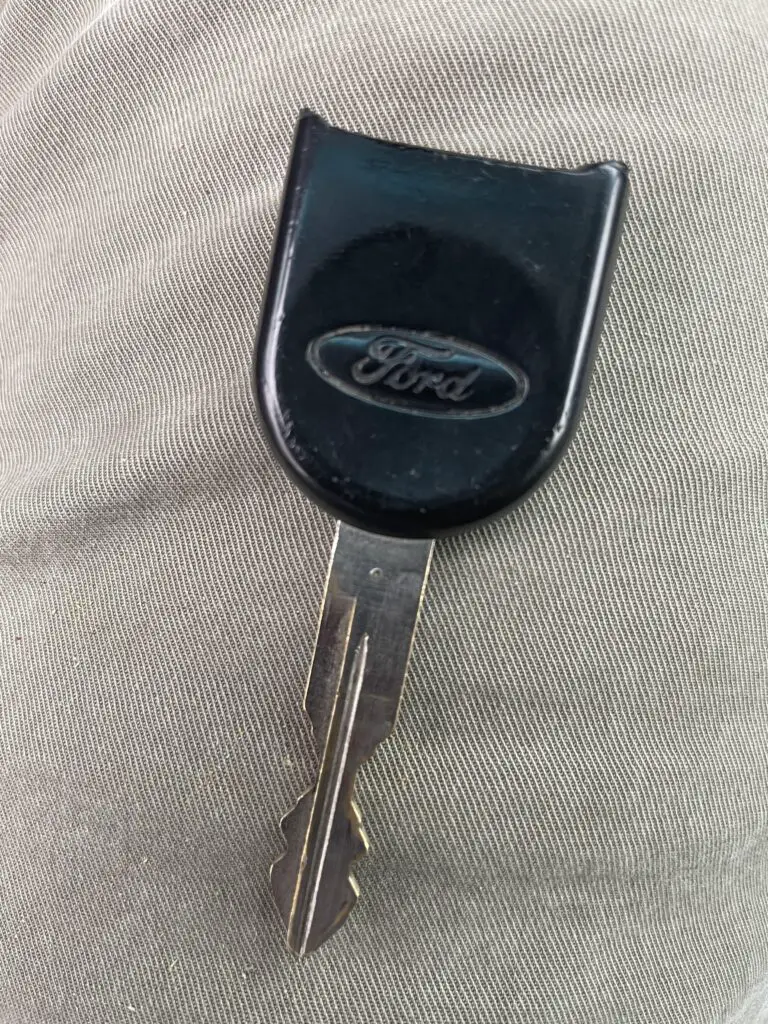
The last tool is the spare tire key or lock removal tool. Some trucks have a lock on the spare tire carrier. This key unlocks the carrier before the winch will turn. Keep it with the jack tools so it is there when you need it.
Locate The Spare Tire
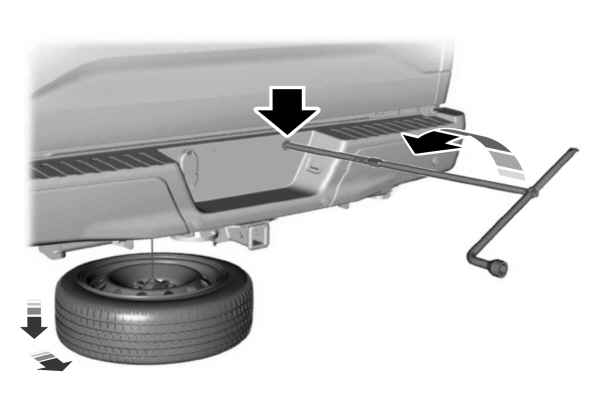
The spare tire is mounted under the rear of the truck bed, between the rear wheels. Look for the round tire shape and the carrier bracket holding it. The drop-down winch sits in the center of the tire, with a square-nut drive that the extension tool fits into. On some model years the access hole is above the rear bumper near the license plate; on others it is under a small cover in the bed floor or rear bumper step.
The hoist is a metal tool. It is in the middle of the spare tire. It has a small hole. This hole is for a special tool. The tool helps to lower the tire. The hoist is strong. It holds the tire tight. Use the tool to turn the hoist. The tire will come down.
Access Spare Tire
Locate the access cover at the rear of your F150, usually above the bumper or near the license plate. Lift or pry it off gently with a flat tool so you do not break the tabs. Behind it you will see the square-nut drive for the winch. If your truck has a spare tire lock, insert the key and turn it to unlock the carrier before cranking.
Find the spare tire key inside your F150. It might be in the glove box or with the jack tools. Insert the key into the hole behind the access cover. This will help you lower the spare tire. Turn the key until the tire is free.
Lower The Spare Tire
Safety Setup Before You Start
Park on a flat, hard surface and set the parking brake. Put wheel chocks in front of and behind a wheel that stays on the ground. Turn on your hazard lights and, if you are on a roadside, stay visible with a reflective vest or triangles. Never lie under the truck while it is supported only by a jack. If you are changing the tire, loosen the lug nuts slightly before lifting the truck.
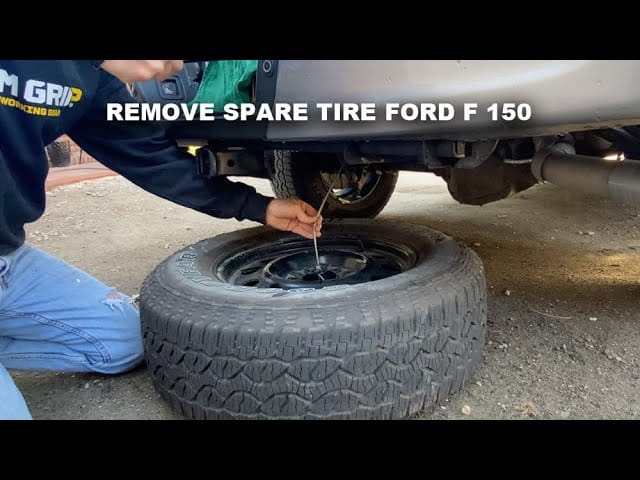
Assemble the factory tool: connect the extension rods to the crank handle, then fit the square socket onto the winch drive. Turn counterclockwise to lower the tire. If you do not have the factory tool, a 3/4 inch or 19mm socket on a long extension, a lug wrench that fits the square nut, or a pair of locking pliers on the square nut will work. Turn counterclockwise slowly and keep tension on the tool so it does not slip off.
Place the tire iron on the bolt. It is in the middle of the tire. Turn the tire iron counterclockwise. This means turning it to the left. Turning left makes the tire come down. Keep turning until the tire is on the ground. Make sure the tire is not stuck.
Detach The Spare Tire
Keep turning counterclockwise until the cable is slack and the tire rests on the ground. Do not let the tire drop suddenly. Once it is down, release the carrier bracket by sliding the tire off the cable end or unhooking the bracket, depending on your model year. Then pull the tire toward you and out from under the truck.
Once the tire is lowered, it is time to pull. Be careful and avoid getting hurt. Grab the tire edge. Pull it towards you. It might be heavy, so be ready. Ensure you have a clear path. Move the tire away from the truck. Store the tire safely.
Troubleshooting Stuck, Rusted, or Rounded Nuts
If the winch will not turn, the square nut may be rusted or the cable may be stuck. Spray penetrating oil on the square nut and the cable guide, wait a few minutes, then try again with steady pressure. A rounded nut can often be gripped with locking pliers or a slightly smaller socket tapped on. If the cable is kinked or the carrier is bent, do not force it — have the truck towed or the carrier replaced.

Inspect Spare Tire
Always check the spare tire for any damage or cracks. These signs mean the tire is not safe. Look closely at the tread. It should not be worn down. If the tread is low, the tire may slip on the road.
A spare tire should be properly inflated. Use a tire gauge to check the pressure. The correct pressure keeps the tire safe. If the tire is low on air, fill it up. Keep the pressure at the right level for safety.
Maintenance Tips to Avoid Future Problems
Once a year, lower the spare a few inches and crank it back up to keep the winch moving freely. Lubricate the winch mechanism and the square-nut drive with a light grease. Inspect the cable for corrosion, fraying, or kinks, and replace it if damaged. Check the spare tire pressure monthly and keep it at the pressure listed on your door jamb label. A maintained spare is one you can actually use when you need it.
Store Tools And Equipment
To reinstall, lift the tire onto the carrier bracket and hook it in place. Turn the winch clockwise until the tire is snug against the underside of the bed. Stop when the cable is tight but not crushing the tire — over-tightening can bend the carrier or damage the cable, and too loose causes rattle. Lower the truck, then tighten the lug nuts in a star pattern to the torque spec in your owner’s manual, typically around 150 lb-ft for F-150 lug nuts.
Before you drive, test the spare by lowering it a few inches and cranking it back up. This confirms the winch and cable are working. Lubricate the winch mechanism and check the cable for rust or fraying at least once a year, especially if you live in a salt-belt state. A stuck or rusted carrier is the most common reason the spare will not drop when you need it.
Frequently Asked Questions
How Do I Locate The Spare Tire On An F150?
To locate the spare tire on an F150, check under the truck’s rear. It’s typically mounted beneath the bed, between the rear wheels. You may need to look closely or crouch down. This location helps maximize cargo space while keeping the spare tire easily accessible.
What Tools Are Needed To Remove The Spare Tire?
You’ll need the tire iron, jack, and the spare tire removal tool, usually found with your F150’s tool kit. These tools are essential for safely lowering and removing the spare tire. Make sure to familiarize yourself with their use before starting the removal process.
How Do I Lower The Spare Tire On An F150?
Insert the spare tire removal tool into the access hole near the license plate. Turn it counterclockwise to lower the tire. Ensure the tire descends smoothly to avoid damage. Once lowered, detach the tire from the cable and proceed with your tire change.
What size is the F-150 spare tire nut?
Most 2004–2024 F-150s use a 3/4 inch or 19mm square nut on the spare tire winch. Some model years use a slightly different size, so test-fit a socket before applying force. If you do not have the factory tool, a 3/4 inch or 19mm socket on a long extension is the most reliable substitute.
Can I Remove The Spare Tire Without A Key?
Yes, you can remove the spare tire without the key by using a flathead screwdriver or a socket that fits the square nut. Insert the tool into the lock or onto the square-nut drive, then turn counterclockwise. Be cautious, as forcing a locked carrier can damage the lock or the winch. If the nut is rusted or rounded, apply penetrating oil and use locking pliers. It is advisable to have the proper key for a smoother and safer removal.
Conclusion
Removing the spare tire from your F150 is simple. Follow the steps carefully. First, gather your tools. Then, locate the spare tire mechanism. Lower the tire gently using the crank. Ensure safety by securing the vehicle. Place the spare tire in a safe spot.
Practice these steps for confidence during emergencies. Regular checks of your spare tire’s condition are wise. This helps maintain readiness. Now, you’re prepared to handle a flat tire efficiently. With these tips, you’re good to go. Safe travels!
Related posts:
 How Far Can You Drive Without an Alternator? Real Distances
 What Color Is Avalanche for Ford? The Definitive 2026 Guide
 How to Disengage 4WD in Ford F150: Easy Steps to 2H
 Ford F150 Power Steering Assist Fault: Fix by Year, Codes & Cost
 What Lug Pattern is a Ford F150: Unveiling the Perfect Fit for Your Ride
 Does My F150 Have Remote Start? 3 Easy Ways to Check
 Does 2016 F150 Have Apple CarPlay? SYNC 3 vs SYNC 2 Guide
 Best 6X8 Speakers for Ford F150: Tested & Reviewed
 Best Adjustable Hitch for F150
 How to Change Battery in F150 Key Fob
 5 Best Ford F150 Bed Covers: Expert Picks & Quality Tested
 Best Tuners for Ford F150 EcoBoost to Boost Performance