How to Disconnect F150 Battery: Easy Steps
To disconnect the battery on an F150, remove the clamp and then disconnect the battery. Prepare to install the new battery and then install it.
Introduction To Disconnecting F150 Battery
Disconnecting the F150 battery is a simple process that involves removing the battery clamp, disconnecting the battery, and then installing a new battery. Make sure to disconnect the negative terminal first and then the positive terminal.
Why Disconnecting The Battery Is Necessary
Disconnecting the battery in your F150 is necessary for various reasons. One of the main reasons is to prevent electrical issues during maintenance or repairs. Disc disconnecting the battery eliminates the risk of short circuits and damage to sensitive electronic components. Additionally, disconnecting the battery can also help reset the vehicle’s computer system, allowing for proper diagnostics and troubleshooting. Whether you are replacing the battery or working on other parts of the vehicle, it is important to understand why disconnecting the battery is necessary for a safe and successful repair process.
Safety Precautions To Consider
When it comes to disconnecting the battery in your F150, safety should be your top priority. Adhering to proper safety precautions can help prevent accidents and ensure a smooth disconnection process. Here are some important safety measures to consider:
1. Protective gear: Before starting, make sure to wear protective gear such as gloves and safety goggles to protect yourself from any potential hazards.
2. Ensure a cool engine: Before disconnecting the battery, allow the engine to cool down completely to avoid any risk of burns or injuries.
3. Turn off all electrical components: Before disconnecting the battery, turn off all electrical components such as lights, radio, and air conditioning to prevent any power surges or electrical shocks.
4. Disconnect the negative terminal first: When disconnecting the battery cables, always start with the negative terminal. This helps prevent any accidental short circuits or sparks.
5. Secure the disconnected cables: After disconnecting the battery, make sure to secure the disconnected cables in a safe position to avoid any accidental contact with metal surfaces.
6. Use insulated tools: When working with the battery, always use insulated tools to minimize the risk of electrical shocks.
7. Properly dispose of the old battery: If you are replacing the battery, ensure proper disposal of the old battery by taking it to a recycling center or a designated battery disposal facility.
By following these safety precautions, you can effectively disconnect the battery in your F150 without any accidents or mishaps. Remember, safety should always be the priority when working with any vehicle’s electrical system.
Steps To Disconnect F150 Battery
If you’re looking to disconnect the battery on your F150, here are the steps to follow:
Step 1: Locate The Battery And Remove The Battery Clamp
The first step is to locate the battery in your F150. In most models, the battery is located in the engine bay. Once you’ve found the battery, carefully remove the battery clamp that secures the battery in place. This clamp is usually held in place by bolts or screws, so you may need a wrench or screwdriver to remove it.
Step 2: Disconnect The Battery Cables
After removing the battery clamp, it’s time to disconnect the battery cables. Start with the negative cable, which is usually marked with a minus (-) sign or the color black. Carefully loosen the bolt or nut that secures the cable to the battery terminal, and then gently pull the cable away from the terminal. Make sure to keep the cable away from any metal surfaces to prevent accidental contact.
Next, move on to the positive cable, which is usually marked with a plus (+) sign or the color red. Follow the same process as above, loosening the bolt or nut and removing the cable from the terminal.
Step 3: Remove The Old Battery
With the battery cables disconnected, you can now safely remove the old battery from your F150. Carefully lift the battery out of the battery tray, ensuring that you have a firm grip to prevent any accidents or spills. Dispose of the old battery properly according to your local regulations.
Now that you’ve successfully disconnected the battery in your F150, you can proceed with any maintenance or repairs you need to do. Remember to follow the reverse order when reconnecting the battery cables – positive cable first, then negative cable. Always ensure that the battery clamp is securely fastened to keep the battery in place.
Preparing For Battery Installation
To disconnect an F150 battery, start by removing the battery clamp followed by disconnecting the negative terminal. Then, remove the battery, prepare to install the new one, and finally, install the new battery. Be sure to connect the positive terminal first when installing the new battery.
Step 4: Prepare For Installing The New Battery
Once you have successfully disconnected the F150 battery, it’s time to prepare for installing the new one. This step is crucial to ensure a smooth and efficient installation process.
Here Are Some Important Steps To Follow:
- Inspect the battery compartment: Before installing the new battery, take a moment to inspect the battery compartment. Look for any signs of corrosion or damage that may need to be addressed before proceeding.
- Clean the battery terminals: Cleaning the battery terminals is an essential part of preparing for installation. Use a battery terminal cleaner or a mixture of baking soda and water to remove any built-up dirt, grease, or corrosion from the terminals.
- Check the battery hold-down: Ensure that the battery hold-down is secure and in good condition. If necessary, tighten any loose bolts or replace any damaged hold-down components.
- Verify the battery specifications: Before installing the new battery, double-check that it matches the specifications of your F150. Ensure that the size, voltage, and cold-cranking amps (CCA) are compatible.
- Prepare necessary tools: Gather the necessary tools for the installation, such as a wrench or socket set, battery terminal cleaner, and gloves. Having everything prepared beforehand will make the process much more efficient.
- Review the manufacturer’s instructions: Take a moment to review the manufacturer’s instructions for installing the battery. This will help you understand any specific requirements or precautions that need to be taken during the installation process.
By following these steps and properly preparing to install the new battery, you can ensure a hassle-free experience and maximize the performance of your F150.
Frequently Asked Questions For How To Disconnect F150 Battery
How Do You Disconnect The Battery From A F150?
To disconnect the battery from an F150, follow these steps: 1. Remove the battery clamp. 2. Disconnect the battery by removing the cables, starting with the negative terminal followed by the positive. 3. Remove the old battery. 4. Prepare to install the new battery. 5. Install the new battery.
Which Battery Terminal Do I Disconnect First?
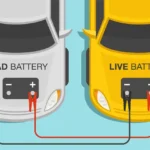
To disconnect the car battery terminals, always disconnect the negative terminal first, then the positive. When reconnecting, do it in the reverse order: positive, then negative. This ensures safety and prevents any electrical issues.
How Do You Disconnect A Battery?
To disconnect a battery, follow these steps:1. Remove the battery clamp. 2. Disconnect the negative terminal first, followed by the positive terminal. 3. Remove the old battery. 4. Prepare to install the new battery. 5. Install the new battery. Note: It’s important to connect the positive terminal first, then the negative when installing the new battery.
How Do I Reset My F150 Battery Management System?
To reset your F150 battery management system, follow these steps:
1. Remove the battery clamp and disconnect the battery. 2. Take out the old battery and prepare to install the new one. 3. Install the new battery, reconnect the cables, and apply battery terminal grease. 4. Start the vehicle and test drive to ensure everything is functioning properly. Remember to disconnect the negative terminal first and reconnect it last.
Conclusion
Disconnecting the battery of your F150 is a simple process that allows for various maintenance and repair tasks. Remember to follow the correct order: disconnect the negative terminal first, then the positive. When reconnecting, reverse the order, connecting the positive terminal first and then the negative.
This ensures safety and prevents any electrical damage. By following these steps, you can easily and safely disconnect the battery of your F150.

