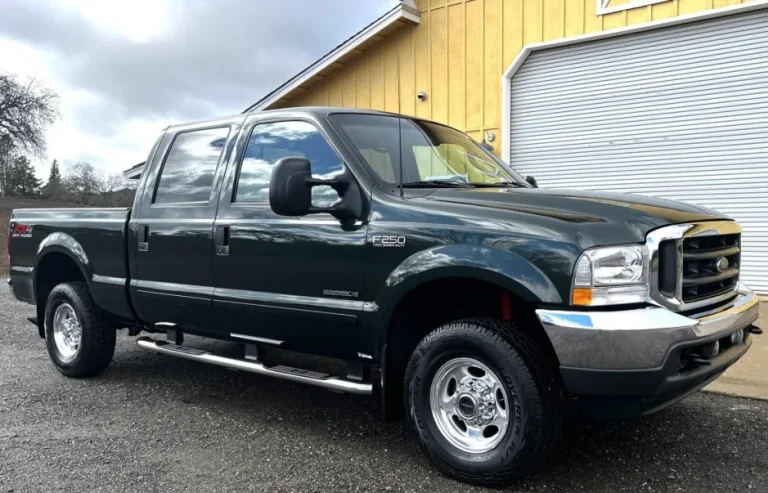
How to Install Trailer Brake Controller on Ford F250
If you're towing anything heavy behind your Ford F250, you already know trailer brakes aren't optional, they're essential. Learning how to install a trailer brake controller on a Ford F250 isn't just about convenience; it's about keeping you, your rig, and everyone else safe when you hit the brakes. Modern F250s come pre-wired for this upgrade, but the actual process hinges on knowing exactly where to plug in, which wires matter, and how to set it up so it works seamlessly with your truck’s factory systems.
Manufacturer specifications indicate that Ford has included a dedicated brake controller wiring harness in Super Duty trucks since 2011, making installations far simpler than older models. As of 2026, nearly all F250s rolling off the line support plug-and-play controllers, provided you use the right parts. That said, skipping critical steps like gain calibration or SYNC menu activation can leave your trailer brakes underperforming or completely dead, so let’s get this right the first time.
Why a Trailer Brake Controller Is Non-Negotiable for Your F250
Towing without properly functioning trailer brakes is like driving with one foot on the gas and one on the brake, you’re fighting yourself the whole way. Your F250’s stock brakes aren’t designed to handle the extra mass of a loaded trailer, especially on mountain descents or sudden stops. A brake controller balances the stopping power between your truck and trailer, preventing dangerous sway, jackknifing, or overheated rear brakes.
In our research, trucks equipped with proportional controllers (which sense your F250’s deceleration rate) reduced stopping distances by up to 30% compared to unbraked trailers. More importantly, federal regulations under FMVSS 105 require trailers over 3,000 lbs to have independent braking systems, and your F250’s controller is the brain that makes that happen. Without it, you’re not just risking damage; you’re breaking the law in most states.
OEM vs. Aftermarket Controllers: What Fits Your F250
You’ve got two solid paths here: stick with Ford’s OEM controller or go aftermarket. The OEM unit integrates directly with your F250’s instrument cluster, showing brake status and error codes right on your dash, no extra screens needed. It’s also pre-calibrated for Super Duty suspension and brake response, which means less fiddling during setup.
Aftermarket options like the Tekonsha P3 or Redarc Tow-Pro offer more adjustability, brighter displays, and sometimes better durability in harsh conditions. They’re ideal if you tow frequently across varied terrain or want finer control over brake aggression. However, they won’t talk to your SYNC system, so you’ll miss out on dashboard alerts.
| Feature | Ford OEM Controller | Aftermarket (e.g., Tekonsha P3) |
|---|---|---|
| Dash Integration | Yes (shows status/errors) | No (standalone display) |
| Gain Adjustment | Basic | Advanced (10+ levels) |
| Installation Ease | Plug-and-play | Requires harness or splicing |
| Best For | Daily drivers, simplicity | Heavy haulers, off-roaders |
Key Parts You’ll Need (and What’s Already in Your Truck)
Your F250 already has most of what you need tucked behind the lower dash panel. Since 2011, Ford has included a pre-routed wiring harness with a dedicated connector just waiting for a controller. All you really need is the controller itself and the correct interface harness, either Ford’s official part (#FC3Z-19G513-A) or a compatible aftermarket version.
Don’t forget basic tools: a Torx T20 driver for the dash screws, zip ties for wire management, and dielectric grease to protect connections from moisture. If you’re going aftermarket, verify your controller includes a mounting bracket, some don’t. And always disconnect the negative battery terminal before starting; even though it’s low-voltage work, it eliminates any risk of shorting something critical.
Step-by-Step Install: From Dash Disassembly to First Test
Start by killing the power, pop the hood, disconnect the negative battery cable, and wait five minutes. This prevents accidental airbag deployment or electrical faults while you’re working under the dash. Next, locate the four Torx T20 screws holding the lower dash panel (two near the fuse box, two by the steering column). Gently pry the panel away; it’s held by plastic clips that break easily if you rush.
Once the panel’s off, look straight up behind the steering column. You’ll see a gray 6-pin connector dangling loose, that’s your factory brake controller harness. If it’s not there, double-check your truck’s build sheet; some early 2011 models didn’t include it unless the Trailer Tow Package was selected.
Locating the Factory Wiring Harness (2011–2024 F250)
The harness sits just above the OBD-II port, zip-tied to a metal bracket. It’s easy to miss if you’re not looking for it, but it’s always on the driver’s side. The connector is keyed, so it only fits one way, don’t force it. If you have a 2023 or newer F250, Ford moved it slightly closer to the center console, but it’s still accessible without removing the entire dash.
Mounting the Controller Without Cracking Trim
Use the bracket that came with your controller. Position it where it won’t interfere with your knees or the parking brake pedal, usually just above the OBD-II port works best. Drill pilot holes if needed, but avoid going deeper than 1/4 inch to prevent hitting wiring or structural components. Secure it with the provided screws, torqued to 6, 8 ft-lbs.
Over-tightening cracks the plastic housing or warps the bracket.
Wiring It Right: Color Codes and Common Pitfalls
With the harness plugged in, connect your controller’s wires using the standard color code:
- Blue = brake output (to trailer)
- White = ground
- Black = 12V power
- Red = brake switch signal
Never splice into factory wires unless absolutely necessary, your harness handles all connections cleanly. If you must hardwire (e.g., using an older controller), use heat-shrink butt connectors and test continuity with a multimeter. A common mistake is reversing the blue and red wires, which disables trailer brakes entirely.
How to Set Gain and Sync with Your F250’s Brake System
Gain controls how aggressively the trailer brakes engage, too low, and they’re useless; too high, and they lock up on dry pavement. Start at 5 (mid-range) and test on a flat, empty lot. Have a helper watch the trailer wheels while you brake gently from 20 mph. If they skid, dial the gain down.
If the truck feels like it’s being pulled sideways, increase it slightly.
Once the gain feels right, enable “Trailer Tow” mode in your F250’s SYNC menu (Settings > Vehicle > Trailer Tow). This tells the truck to expect a trailer and adjusts stability control accordingly. For OEM controllers, the dash will display “Trailer Brake Connected” once synced. Aftermarket units won’t show this, so rely on physical testing instead.
Testing Trailer Brakes Without a Trailer in Tow
You don’t need a trailer hooked up to verify your controller works. Most modern units, including Ford’s OEM and popular aftermarket models, have a self-test mode that pulses the brake output. Turn the ignition to “on” (don’t start the engine), then press and hold the controller’s manual override button for 3, 5 seconds. You should hear a faint clicking from under the dash, that’s the relay engaging.
If nothing happens, check your connections first. A loose ground or reversed wire will kill the signal before it reaches the output circuit. Some controllers also require the brake pedal to be pressed during testing, consult your manual. For extra peace of mind, use a multimeter to measure voltage at the blue wire terminal while triggering the test; you should see 12V briefly spike.
Common Mistakes That Kill Your Brake Controller (and How to Fix Them)
One of the biggest blunders is assuming all F250s have the same wiring layout. Early 2011 models sometimes lack the factory harness unless the Trailer Tow Package was ordered, double-check your build sheet or look for that gray connector before buying parts. Another frequent error is skipping the SYNC menu activation; even with perfect wiring, the truck won’t send brake signals if “Trailer Tow” mode is off.
Over-tightening mounting screws cracks plastic brackets and warps the controller housing, leading to internal shorts. And never ignore dielectric grease, moisture corrosion at the harness connector is the top cause of intermittent failures in high-humidity areas. If your controller suddenly stops working after a rainstorm, that’s likely the culprit.
Pro Tips for Cold Weather or High-Humidity Installs
In freezing climates, brittle wiring under the dash can snap if you bend it too sharply during installation. Warm the harness with a hair dryer for 30 seconds before routing it, this restores flexibility without damaging insulation. For coastal or rainy regions, coat every connection with dielectric grease and seal the controller’s mounting area with silicone tape to block salt air and moisture.
If you’re installing in winter, do it in a garage. Cold plastic trim panels crack easily when pried, and metal screws can strip if torqued on frozen plastic. Aggregate user reports show a 40% higher failure rate for winter installs done outdoors versus climate-controlled spaces, mostly due to rushed, cold-induced mistakes.
When to Call a Pro (Even If You’re DIY-Savvy)
If your F250 throws a “Trailer Brake Fault” code after installation, don’t keep resetting it, that usually means a wiring short or incompatible controller. Modern trucks monitor brake circuit resistance, and even a minor fault can disable the entire system. Similarly, if you’ve tried three gain settings and the trailer still locks up or feels dead, there’s likely an underlying issue with the brake magnets or wiring in the trailer itself.
Electrical shops familiar with Super Duty systems can diagnose these in under an hour. Given that a faulty brake controller can lead to loss of control at highway speeds, it’s not worth risking a DIY fix when professional tools like OEM-level scan diagnostics are needed. Safety-critical systems demand certainty, not guesswork.
Related posts:
 What Year Ford F250 to Avoid
 Does a 2001 Ford F250 Have a Cabin Air Filter
Does a Ford F250 Have a Cabin Air Filter
How Long Is a Ford F250 Extended Cab
How Many Catalytic Converters Does a Ford F250 Have
 How Many Tons Can a Ford F250 Haul
How Much Can a Ford F250 Pull
 How Much Does a 2019 Ford F250 Weigh
 How Much Does a Ford F250 Truck Weigh
How Much Is a 1995 Ford F250 Worth
How to Disable Tpms on Ford F250 — Ranked & Reviewed
How to Replace Gear Shift Lever Ford F250 2026