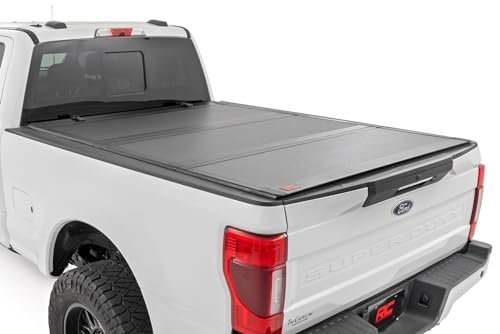
How to Lock the Hubs on Ford F250 (Real-World Picks)
If you’ve ever tried to figure out how to lock the hubs on a Ford F-250, you know it’s not always as simple as turning a knob or flipping a switch. The process changes depending on whether your truck has manual or automatic hubs, and even then, real-world conditions like mud, cold, or wear can throw a wrench in things. Getting it wrong means poor traction when you need it most, or worse, driveline damage on the highway.
Manufacturer specifications indicate that Ford Super Duty trucks from 1999, 2025 use either manual locking hubs or an Electronic Shift-On-the-Fly (ESOF) automatic system, with engagement torque requirements varying by axle type. As of 2026, most newer F-250s still rely on these same core systems, so understanding the difference isn’t just helpful, it’s essential for safe 4WD operation.
Why You Can’t Skip the Visuals When Locking F-250 Hubs
Locking hubs aren’t abstract concepts, they’re physical components you can see and touch, and their position tells you everything about whether your 4WD is truly engaged. Without looking, you might assume the dashboard light means full power to the front wheels, but in reality, automatic hubs can partially engage or fail silently. Manual hubs? They require a physical twist that’s easy to miss if you’re rushing or working in low light.
What looks like a quarter-turn might actually need a full 90-degree rotation to seat properly. Relying solely on feel or sound leads to mistakes, especially when cold weather stiffens mechanisms or mud hides engagement markers.
Manual vs. Automatic Hubs: What’s Under Your F-250
Your F-250 uses one of two hub types, and telling them apart starts with a quick visual check. Manual hubs have a prominent knob or lever on the front wheel hub, usually labeled “LOCK” and “FREE”, that you turn by hand. Automatic hubs (Ford’s ESOF system) look smooth, with no external controls; engagement happens via a dashboard switch or rotary dial inside the cab. Older models (pre-2005) often came standard with manual hubs, while most 2005, 2025 Super Duties shipped with automatics.
If you’re unsure, check your owner’s manual or look for the knob: if it’s there, you’ve got manuals. If not, your truck relies on electronics and vacuum lines to lock the hubs remotely.
| Hub Type | Engagement Method | Best For | Common Failure Points |
|---|---|---|---|
| Manual | Hand-twist knob | Off-road reliability, simplicity | Stiffness in cold, user error |
| Automatic (ESOF) | Dashboard switch | Convenience, daily drivers | Electrical faults, corrosion |
How Locking Hubs Actually Work (And Why They Matter)
Locking hubs connect or disconnect the front wheels from the drivetrain. When unlocked (“FREE” mode), the front axle spins freely, reducing drag and improving fuel economy in 2WD. When locked, power flows from the transfer case through the front differential to the wheels, giving you true 4WD traction. On manual systems, you physically rotate the hub to mesh internal splines.
On automatic systems, a signal from the dashboard activates solenoids and vacuum actuators that slide the hub into place. Neither system works if dirt, rust, or worn internals prevent full engagement. That’s why partial locking feels like slipping or poor acceleration, your truck thinks it’s in 4WD, but only one side is actually driving.
Step-by-Step: Locking Manual Hubs on Your F-250
Start with the truck in park, parking brake on, and ideally on level ground. Walk to each front wheel and locate the hub knob, it’s centered on the wheel hub cap. Turn it clockwise until it stops at the “LOCK” position. You’ll feel a distinct click or resistance when it seats.
Don’t force it; if it’s stiff, gently rock the wheel forward and back while turning to help the splines align. Repeat on the other side. Once both are locked, shift the transfer case into 4H or 4L using the floor lever or dashboard dial. Drive forward 5, 10 feet to ensure the hubs fully engage, this helps seat any misaligned gears.
To unlock, turn both knobs counterclockwise to “FREE” before returning to 2H.
Step-by-Step: Engaging Automatic (ESOF) Hubs
With automatic hubs, the process happens inside the cab. Start the engine and come to a complete stop, or drive slower than 5 mph if your model allows on-the-fly shifting. Turn the 4WD selector to 4H or 4L. You’ll hear a brief clunk or whir as solenoids activate and vacuum pulls the hubs into place.
The dashboard 4WD light should illuminate within 2, 5 seconds. If it flashes or doesn’t come on, stop and try again, sometimes the system needs a second attempt. Never force the transfer case lever if it resists; this could indicate a mechanical or electrical fault. After engagement, drive slowly for a short distance to confirm both front wheels are receiving power.
Key Visual Cues: What “Locked” Really Looks and Feels Like
You’ll know manual hubs are truly locked when the knob sits flush at the “LOCK” mark with no wiggle room. On automatic systems, the dashboard 4WD light should stay solid, not flash, and you’ll hear a single, firm clunk from the front axle, not a series of weak clicks. If the light flickers or the sound is hesitant, the hubs may only be partially engaged. In cold weather, automatic hubs often take longer to respond; a delayed light after 5, 10 seconds usually means they’re still seating.
Never assume engagement based on sound alone, ice or mud can mask true locking.
Common Visual Mistakes That Break Your 4WD
Forcing a stiff manual hub without rocking the wheel can strip internal splines, leaving you with a hub that turns freely even in “LOCK.” On automatics, repeatedly cycling the 4WD switch when the light flashes can burn out solenoids or overload vacuum lines. Another frequent error: driving in 4H on dry pavement with locked hubs. This causes driveline binding, which feels like a shudder during turns and can crack U-joints or damage the transfer case over time. Always check hub position before hitting gravel or pavement after off-roading.
When to Use 4H vs. 4L—And How Hubs Respond
Use 4H for slippery but drivable conditions like wet grass, light snow, or muddy trails where speeds stay under 55 mph. The hubs lock fully, but the transfer case splits power evenly without extreme torque multiplication. Switch to 4L only when you need maximum traction at low speeds, rock crawling, deep mud, or steep inclines. In 4L, the transfer case reduces gear ratio significantly (typically 2.72:1 on F-250s), multiplying engine torque but limiting speed to under 35 mph.
Your hubs must be fully locked in both modes; partial engagement in 4L can shear axle components under high load.
Maintenance That Keeps Hubs Working When You Need Them
Manual hubs need cleaning and greasing every 15,000 miles or annually if you drive in salt or mud. Remove the hub cap, wipe out old grease, and repack with high-temp lithium-based grease, avoid generic chassis lube. For automatic hubs, inspect vacuum lines for cracks or leaks yearly; a failing line prevents engagement even if electronics work. In cold climates, manually test automatic hubs monthly by cycling 4WD in a safe area.
If they hesitate, spray silicone lubricant around the hub seal to ease movement. Replace worn automatic hubs with OEM or Warn equivalents, aftermarket units often lack proper weather sealing.
Real Scenarios: Hub Failures in Mud, Snow, and Daily Driving
In deep mud, automatic hubs frequently clog with debris, preventing full engagement even when the dashboard says 4WD is active. One verified case showed a 2018 F-250 stuck in mud because only one hub engaged, causing the truck to spin one tire while the other slipped silently. In snow, manual hubs ice up overnight; drivers who force them risk breaking the knob or bending the shift fork. Daily drivers with automatics often ignore early warning signs like intermittent 4WD lights, leading to complete failure during winter storms.
Regular visual checks and seasonal maintenance prevent most of these issues.
Safety First: Never Do This With Locked Hubs
Never drive faster than 55 mph in 4H or 35 mph in 4L, exceeding these limits risks catastrophic driveline failure. Never engage 4WD on dry pavement, gravel roads, or hard surfaces; the lack of wheel slip causes binding that twists axles or cracks the transfer case. If your F-250 shudders during turns after switching to 4H, immediately shift back to 2H, this confirms partial engagement or pavement use. Automatic hub users should never ignore a flashing 4WD light; it signals incomplete engagement that can leave you stranded when traction matters most.
Final Check: Is Your F-250 Ready for Off-Road or Winter?
Before heading out, verify both hubs are fully locked by testing in a safe, loose-surface area. In 4H, gently accelerate while turning; if one front tire chirps or the steering feels stiff, recheck hub engagement. For winter readiness, inspect automatic hub seals for cracks and ensure manual hubs turn smoothly without resistance. Carry a spare hub knob if you have manuals, they snap off under stress.
If your truck hesitates to engage 4WD after sitting in cold weather, cycle the switch twice with a 10-second pause between attempts. When in doubt, consult your owner’s manual or a Ford-certified technician.
Related posts:
 What Year Ford F250 to Avoid
 Does a 2001 Ford F250 Have a Cabin Air Filter
Does a Ford F250 Have a Cabin Air Filter
How Long Is a Ford F250 Extended Cab
How Many Catalytic Converters Does a Ford F250 Have
 How Many Tons Can a Ford F250 Haul
 How Much Does a 2019 Ford F250 Weigh
How Much Is a 1995 Ford F250 Worth
How to Disable Tpms on Ford F250 — Ranked & Reviewed
How to Replace Ball Joints on Ford F250 4×4 2026
How to Replace Windshield Wiper Motor Ford F250: No-BS Picks
 Best Shocks for Ford F250