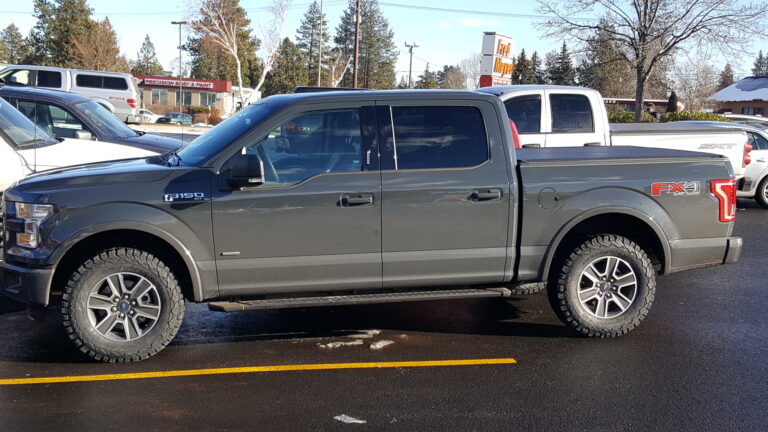
How to Adjust F150 Headlights
Imagine driving at night with confidence, knowing that your headlights are perfectly aligned, illuminating the road ahead. If your F150’s headlights aren’t shining as they should, it’s not just an annoyance; it can be a safety issue.
Properly adjusted headlights ensure you see obstacles in time and avoid blinding other drivers. But how do you make sure your F150’s headlights are doing their job? This guide is crafted for you, the F150 owner eager to enhance your vehicle’s lighting performance without a trip to the mechanic.
You’ll discover simple steps to adjust your headlights, ensuring optimal visibility and safety. Dive in, and let’s make your nighttime drives safer and more enjoyable!
Tools Required
Adjusting the headlights on your F150 can enhance driving safety. Proper alignment ensures optimal visibility, reducing glare for other drivers. Before you start, gather essential tools to make the process smooth and efficient.
1. Screwdriver
A standard screwdriver is vital for adjusting the headlights. It helps to loosen or tighten screws as needed. Make sure it fits well to avoid damaging the screws.
2. Measuring Tape
A measuring tape helps ensure alignment accuracy. You need to measure distances between the headlights and the ground. This tool guarantees the headlights are positioned correctly.
3. Level Surface
A level surface is crucial for accurate headlight adjustment. Park your F150 on flat ground. This ensures the beams are properly aligned and not tilted.
4. Wall Or Garage Door
A wall or garage door serves as a reference point. Use it to mark the height of the headlights. This helps in achieving a precise alignment.
5. Socket Wrench
A socket wrench may be required for some adjustments. It allows you to securely fasten bolts if needed. Choose the right size for a snug fit.
6. Owner’s Manual
Your F150’s owner’s manual provides specific adjustment instructions. It contains diagrams and tips tailored for your vehicle model. Refer to it for detailed guidance.

Safety Precautions
Adjusting F150 headlights requires careful attention to safety. Mistakes can lead to accidents. Following safety precautions ensures a smooth process. Your safety comes first. Understanding these precautions will keep you safe.
Ensure the Vehicle Is On Level Ground
Park your F150 on a flat surface. A level surface ensures accurate alignment. Slopes can mislead headlight adjustments. Avoid gravel or uneven terrain.
Turn Off Engine
Safety begins with a stopped engine. A running engine poses risks. Prevent accidents by turning off the engine. This simple step enhances safety.
Use Protective Gear
Wear gloves and goggles for protection. Protect your eyes and hands from debris. Gear reduces injury risk during adjustments.
Check Headlight Temperature
Feel the headlight to check its temperature. Hot headlights can cause burns. Wait for them to cool before touching. Safety is a priority.
Disconnect Battery
Disconnecting the battery is crucial. It prevents electrical shocks. Ensure your safety by disconnecting it. A simple precaution against accidents.
Have A Buddy Assist
A buddy helps ensure safety. They can check your work. Having someone nearby provides support. Two sets of eyes are better than one.
Locate Adjustment Screws
Find the adjustment screws on your F150 headlights. Usually located near the headlight housing. These screws help align the beams for optimal road visibility.
Adjusting the headlights on your F150 is an essential skill that ensures your safety and enhances your driving experience. One of the first steps in this process is locating the adjustment screws. These screws are crucial as they allow you to alter the direction and height of your headlights. Understanding their location can make the adjustment process much smoother and more efficient.
Locate The Adjustment Screws
Begin by popping the hood of your F150. Once open, take a moment to familiarize yourself with the layout. You’ll find the adjustment screws near the back of the headlight assembly. They’re often hidden under a small plastic cover, so don’t worry if they aren’t immediately visible.
Use A Flashlight For Better Visibility
Sometimes the adjustment screws can be difficult to spot, especially if you’re working in low light. Use a flashlight to illuminate the area. This will help you see the screws more clearly and prevent any unnecessary strain on your eyes. A well-lit workspace makes all the difference when performing car maintenance.
Check The Owner’s Manual
If you’re struggling to locate the adjustment screws, your owner’s manual can be a valuable resource. It often contains diagrams and detailed descriptions of the headlight assembly. This can save you time and frustration. If you don’t have a physical copy, you can usually find a digital version online.
Ensure The Vehicle Is On Level Ground
Before you start adjusting, ensure your F150 is parked on level ground. An uneven surface can skew your adjustments, leading to improper headlight alignment. This could result in poor visibility at night or glare for oncoming drivers. Taking this simple step can save you from having to redo your work.
Consider The Importance Of Proper Tools
Having the right tools can make finding and adjusting the screws much easier. A long screwdriver is often required to reach the adjustment screws. If you don’t have one, consider borrowing or purchasing one. Investing in the proper tools can make car maintenance tasks less daunting.
Have you ever spent ages looking for something only to find it was right under your nose? Locating the adjustment screws can feel like that sometimes. But with patience and the right approach, you’ll find them in no time.
Once you’ve mastered this step, you’re well on your way to ensuring your F150’s headlights are perfectly aligned. This not only improves your visibility but also enhances the safety of everyone on the road. So, why not take a few minutes today to check your headlights?

Prepare Vehicle For Adjustment
Adjusting the headlights on your F150 is crucial for safe driving, especially at night or in adverse weather conditions. But before you get into the nitty-gritty of aligning those beams, it’s essential to prepare your vehicle properly. This preparation ensures that the adjustments you make are accurate and effective. Let’s walk through the steps needed to get your F150 ready for headlight adjustment.
Park On Level Ground
Start by finding a flat and level surface to park your F150. This could be your driveway or a parking lot. Why is this important? Well, parking on an uneven surface can skew the alignment process, leading to incorrect headlight adjustment. Once parked, turn off your engine and let your truck sit idle. A friend once tried adjusting his headlights on a slight slope, and he ended up having to redo the entire process. Save yourself the hassle by ensuring your truck is level.
Measure Distance From Wall
Next, position your F150 a specific distance away from a wall. Generally, 25 feet is a good measure, as it provides ample space for accurate alignment. Use a measuring tape to ensure precision. This distance helps simulate real driving conditions, allowing you to adjust the headlights effectively. Have you ever wondered why your headlights seem off even after adjusting them? Checking the distance might just be the trick you missed. Make sure to mark this distance on the ground for consistency.
Preparing your vehicle might feel like an extra step, but it’s the foundation for a successful headlight adjustment. Without these preparations, you might find yourself squinting at the road or blinding oncoming traffic. So, before you dive into tweaking those beams, take a moment to ensure your F150 is perfectly positioned.
Aligning Headlights Vertically
Adjusting the headlights on your F150 is crucial for safe nighttime driving. Proper alignment ensures you can see clearly while avoiding blinding oncoming traffic. Vertical alignment is one of the key steps in this process. This involves adjusting the height of the headlight beam so it hits the road precisely. Imagine driving down a dark road and your headlights are lighting up the tops of trees instead of the road. It’s not just frustrating; it’s dangerous. Here’s how you can adjust the vertical aim and test the beam height to enhance your driving experience.
Adjust Vertical Aim
Start by parking your F150 on a level surface facing a flat wall or garage door. Ensure the vehicle is about 25 feet away. Mark the center of each headlight on the wall with some tape, keeping these marks level to the ground. This is your reference point.
Open the hood of your truck and locate the vertical adjustment screws on the back of the headlight assembly. These screws allow you to raise or lower the beam. With a Phillips screwdriver, turn the screws slowly to adjust the vertical aim. If your headlights are too high, lower them so the center of the beam aligns with the marks on the wall.
It’s easy to overlook this adjustment, but aligning the headlights properly makes a significant difference. Think about the last time you drove with misaligned lights—how stressful was that? Adjusting the aim can make your next drive much smoother.
Test Beam Height
Once you’ve adjusted the vertical aim, it’s time to test the beam height. Turn on your headlights and observe the beam on the wall. The brightest part should align with or be slightly below the marks you made.
Take a test drive to see how the new alignment feels. Notice how much clearer the road appears and how oncoming drivers are no longer flashing their high beams at you. This simple adjustment can transform your driving experience, making it safer and more enjoyable.
Are your headlights illuminating the road effectively now? If not, you might need to revisit the adjustment. It’s all about trial and error until you find the perfect setting for your vehicle.
Adjusting your headlights may seem like a small task, but their impact on your safety and comfort is huge. Give it a try and enjoy a brighter, clearer drive.
Aligning Headlights Horizontally
Aligning your F150 headlights horizontally is crucial for safe driving. Proper alignment ensures better visibility and minimizes glare for other drivers. Misaligned headlights can cause poor road illumination. This can be dangerous, especially at night or in bad weather. Follow these steps to adjust the horizontal aim of your headlights.
Adjust Horizontal Aim
Park your F150 on a flat surface, facing a wall. Keep a 25-foot distance between the vehicle and the wall. Use masking tape to mark the headlight’s center on the wall. Open the hood and locate the horizontal adjustment screws. These screws are usually on the headlight assembly’s side. Turn the screws using a screwdriver. Aim the beam so it lines up with the tape mark. Ensure both headlights are at the same level.
Test Beam Alignment
After adjusting, test the beam alignment. Turn on the headlights and check the beam’s position on the wall. The brightest part of the beam should be at or just below the tape mark. Drive on a dark road to ensure proper alignment. Adjust further if the beams don’t illuminate evenly. This process will enhance your driving safety and comfort.
Testing Headlight Adjustment
Testing your F150’s headlight adjustment is crucial for safe driving, especially at night. Properly adjusted headlights ensure you have maximum visibility without blinding other drivers. Once you’ve adjusted your headlights, testing them helps confirm whether they are aimed correctly. This process might seem technical, but with the right steps, anyone can do it.
Check Light Distribution
Start by parking your F150 on a level surface facing a blank wall, about 25 feet away. Turn on your headlights and observe the light pattern. The brightest part of each headlight beam should hit the wall just below the height of the headlight itself. This ensures that your lights are illuminating the road, not blinding oncoming traffic.
Use masking tape to mark the center of each light beam on the wall. If the beams are uneven or too high, you’ll need to adjust them until they align correctly. It’s always a good idea to have someone help you check the alignment. Have you ever noticed how a simple adjustment can make a world of difference in your night driving experience?
Ensure Proper Visibility
Take your F150 for a test drive after adjusting the headlights. Pay attention to how well you can see the road and any upcoming obstacles. Are the street signs easily visible? If you find yourself squinting to see the road, it might be worth re-evaluating the alignment.
Consider driving through areas with varying terrain. A winding road or a hilly path can reveal any shortcomings in your headlight adjustments. Do you feel confident in your visibility as you navigate these areas? Remember, your safety relies heavily on how well you can see what’s ahead.
Testing headlight adjustment is not just a task but a commitment to safe driving. The process is straightforward yet impactful. Next time you adjust your F150 headlights, think about the difference it can make in your driving comfort and safety. How often do you test your headlights to ensure optimal alignment? It’s a small step with significant benefits.
Troubleshooting Common Issues
Adjusting F150 headlights can solve common visibility issues. First, park the vehicle on a level surface. Then, use a screwdriver to tweak the adjustment screws for precise alignment. This ensures optimal light coverage while driving at night.
Dealing With Stuck Screws
Encountering stuck screws can be frustrating, but it’s a common issue when adjusting headlights. Begin by ensuring you’re using the correct screwdriver size to prevent stripping. If a screw is particularly stubborn, applying a bit of penetrating oil can help loosen it.
Patience is key. Allow the oil to sit for a few minutes before attempting to turn the screw again. If it still doesn’t budge, try gently tapping the screwdriver with a hammer to break the seal.
In some cases, heat can also be effective. Carefully use a hairdryer or heat gun to warm the area around the screw. This can expand the metal slightly, making it easier to turn.
Addressing Uneven Light Beams
Uneven light beams can be a safety hazard, reducing visibility and causing glare for oncoming traffic. Begin by parking your F150 on a level surface facing a wall. This setup helps you see the beam pattern.
Measure the height from the ground to the center of your headlights and mark this height on the wall. Turn on your headlights and adjust them until the beams are even with the marks.
Sometimes, the issue isn’t with alignment but with the bulb itself. Double-check to see if the bulbs are properly seated in their sockets. A loose bulb can cause misalignment, resulting in uneven beams.
Have you ever noticed that even the smallest adjustment can make a big difference? Ensuring your headlights are correctly aligned not only enhances your driving safety but also contributes to a more comfortable driving experience. Why settle for less when a little effort can make your night drives clearer and safer?
Maintenance Tips
Keeping your F150 headlights in top condition ensures safe nighttime driving. Regular maintenance can prevent visibility issues and prolong the lifespan of your lights. Below are some essential maintenance tips to keep your headlights shining bright.
Regular Checks
Inspect your headlights weekly. Look for any signs of damage or misalignment. Ensure the bulbs work properly and the light beams aim correctly. A quick check can catch minor issues before they become major problems.
Cleaning Headlight Lenses
Dirty lenses reduce visibility. Clean them with a soft cloth and mild detergent. Avoid harsh chemicals that can damage the lens surface. Regular cleaning keeps your headlights clear and effective.
Frequently Asked Questions
How Do I Adjust F150 Headlights?
To adjust F150 headlights, locate the adjustment screws behind the headlight assembly. Use a Phillips screwdriver to turn these screws. Adjust the vertical and horizontal aim until the beams align correctly with the road. Ensure the vehicle is on a level surface and the headlights are on.
What Tools Are Needed For Headlight Adjustment?
You’ll need a Phillips screwdriver to adjust F150 headlights. This tool helps in turning the adjustment screws. Ensure you have a tape measure and a level surface. These assist in accurately measuring and aligning the headlight beams. Proper tools ensure precise adjustments for optimal visibility.
Why Is Headlight Adjustment Important?
Proper headlight adjustment is crucial for safe driving. Misaligned headlights can impair visibility and blind other drivers. Correctly adjusted headlights illuminate the road effectively. This enhances your driving experience and ensures safety. Regularly check your headlights to maintain optimal performance and road safety.
Can I Adjust F150 Headlights Myself?
Yes, you can adjust F150 headlights yourself. It requires basic tools and patience. Follow the vehicle’s manual instructions for precise adjustments. Ensure the vehicle is on a level surface. Proper alignment ensures safety and optimal visibility. Regular checks help maintain correct headlight positioning.
Conclusion
Adjusting your F150 headlights can improve your night driving experience. It’s important to ensure they are properly aligned for safety. Follow the steps outlined in this guide. Use simple tools and clear instructions to get the job done. You can easily adjust the headlights at home.
Regular checks help maintain optimal light performance. Keep roadways well-lit and drive with confidence. A few minutes of effort can make a big difference. Feel safer during nighttime drives. Enjoy the improved visibility and peace of mind. Stay safe on the road with properly adjusted headlights.


